63
the restorations look with the gingiva in the proper position. Then,
once the entire restorative design was complete, the Gingiva Mask
was again referenced to ensure all esthetics were correct (Fig. 11).
MILLING & ADHESIVE CEMENTATION
After the restoration design was complete, the case was digitally
transferred to the in-office CEREC milling unit. This CAD/CAM
systemenables quick and accurate fabrication of laboratory-grade,
all-ceramic restorations via precise machining.
9,10
During the milling process, the retraction cord was removed to
allow for immediate tissue rebound. Additionally, because the first
retraction cord tends tomigrate apically during longer appointments,
removing the cords at this time prevented any difficulties that could
have occurred by retrieving it post-cementation — a precaution that
also reduces any patient discomfort that removal could have caused.
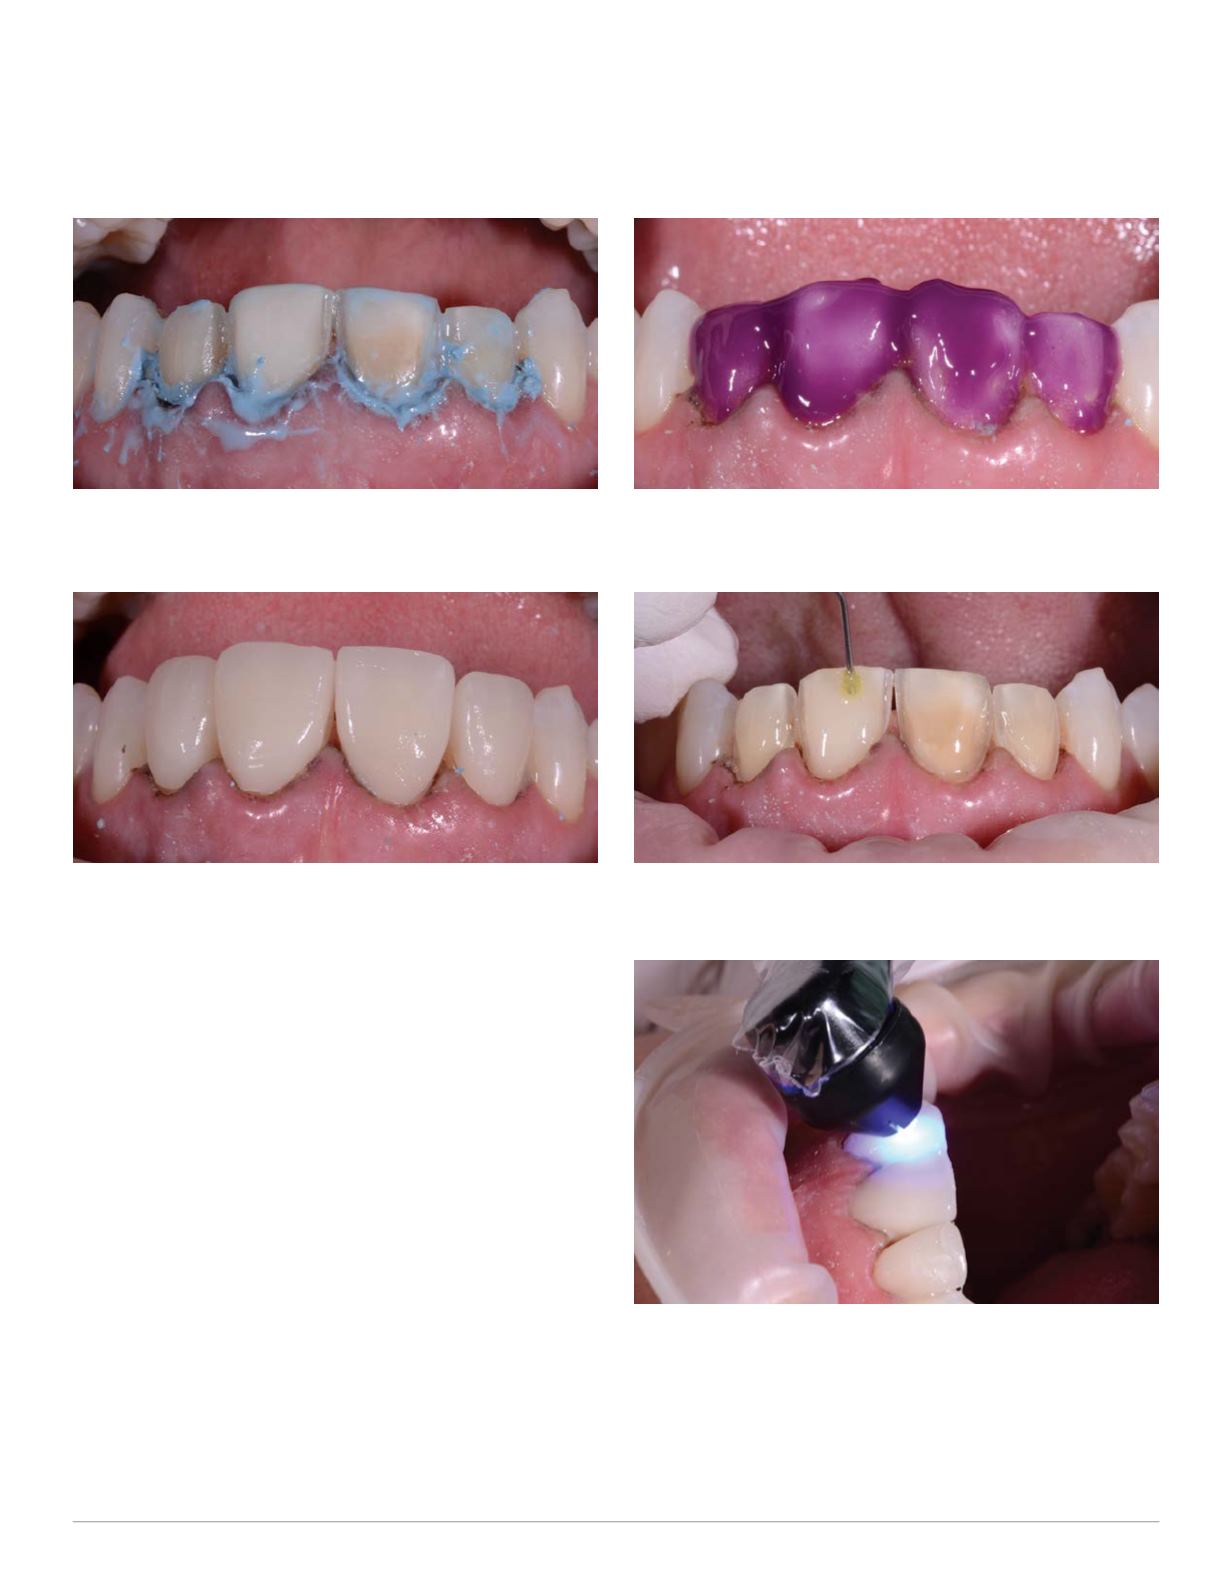
To control any bleeding, a retraction paste (3MESPE) was applied.
Thisnot only controlledbleedingbut alsodriedout the sulcular tissue
to prevent crevicular fluid issues during cementation (Fig. 12).
After milling, the restorations were tried in the mouth to verify
Fig.12: A retraction paste was applied to control bleeding and dry out
the sulcular tissue
Fig. 13: The restorations were tried in using Variolink Esthetic light-
cure try-in paste in theWarm shade
Fig. 14: The tooth preparations were etched for 15 seconds using 35
percent phosphoric acid gel
Fig. 15: The Adhese Universal Bonding agent was scrubbed on to the
tooth preparations
Fig. 16: The restorations were tack cured from the facial aspect for
three seconds each


