62
|
CERECDOCTORS.COM
|
QUARTER 1
|
2016
the interproximal areas were refined with a finishing strip (Fig. 8).
This created a clean, definitive margin that could be very easily
read by the CEREC Omnicam intraoral scanner, even though the
contact was not broken.
DIGITAL RESTORATION DESIGN
The area of teeth #7 through #10 was cut from the model, the area
re-scanned and a buccal bite scan taken. Once the CAD software
combined everything together, the images of the lower and maxil-
lary arches, buccal bite and wax-up were ready in the Biocopy
folder, as well as the pre-retraction maxillary arch image in the
Gingiva Mask folder (Fig. 9).
The overall veneer restoration designs were created using
the Biocopy technique based on an exact copy of the enhanced
wax-up design and contours. This provided a nice overall shape
for the restoration design, maintained the midline length and, for
the most part, the line angles.
Because the surface of a wax-up can be rough when it is copied/
| | |
O ’ B RYA N
scanned, the Form Smooth tool was used to virtually produce a
very smooth surface — albeit one that lacked texture and contour.
Therefore, texture and characterization for the teeth surfaces
were added utilizing the Incisal Variation tool.
Incisal Variation tool effects can be layered to establish both
gingival texture and incisal developmental grooves (Fig. 10). This
is accomplished by selecting Link Options and linking all the teeth
together, thenmoving to the Incisal Variation tool and selecting the
type of morphology desired for the tooth/teeth and its strength. In
this case, Variation 1 was chosen at a strength of 35 percent.
Once the desired intensity was achieved, the effect was positioned
over the tooth; the Incisal Variation tool turned off, and another tool
selected. This set the morphology that was just applied. Then, after
switching tools, it was possible to go back to the Incisal Variation tool
and select the next morphology. In this case, Variation 5 — which
imparts perikymata —was also applied at a strength of 35 percent.
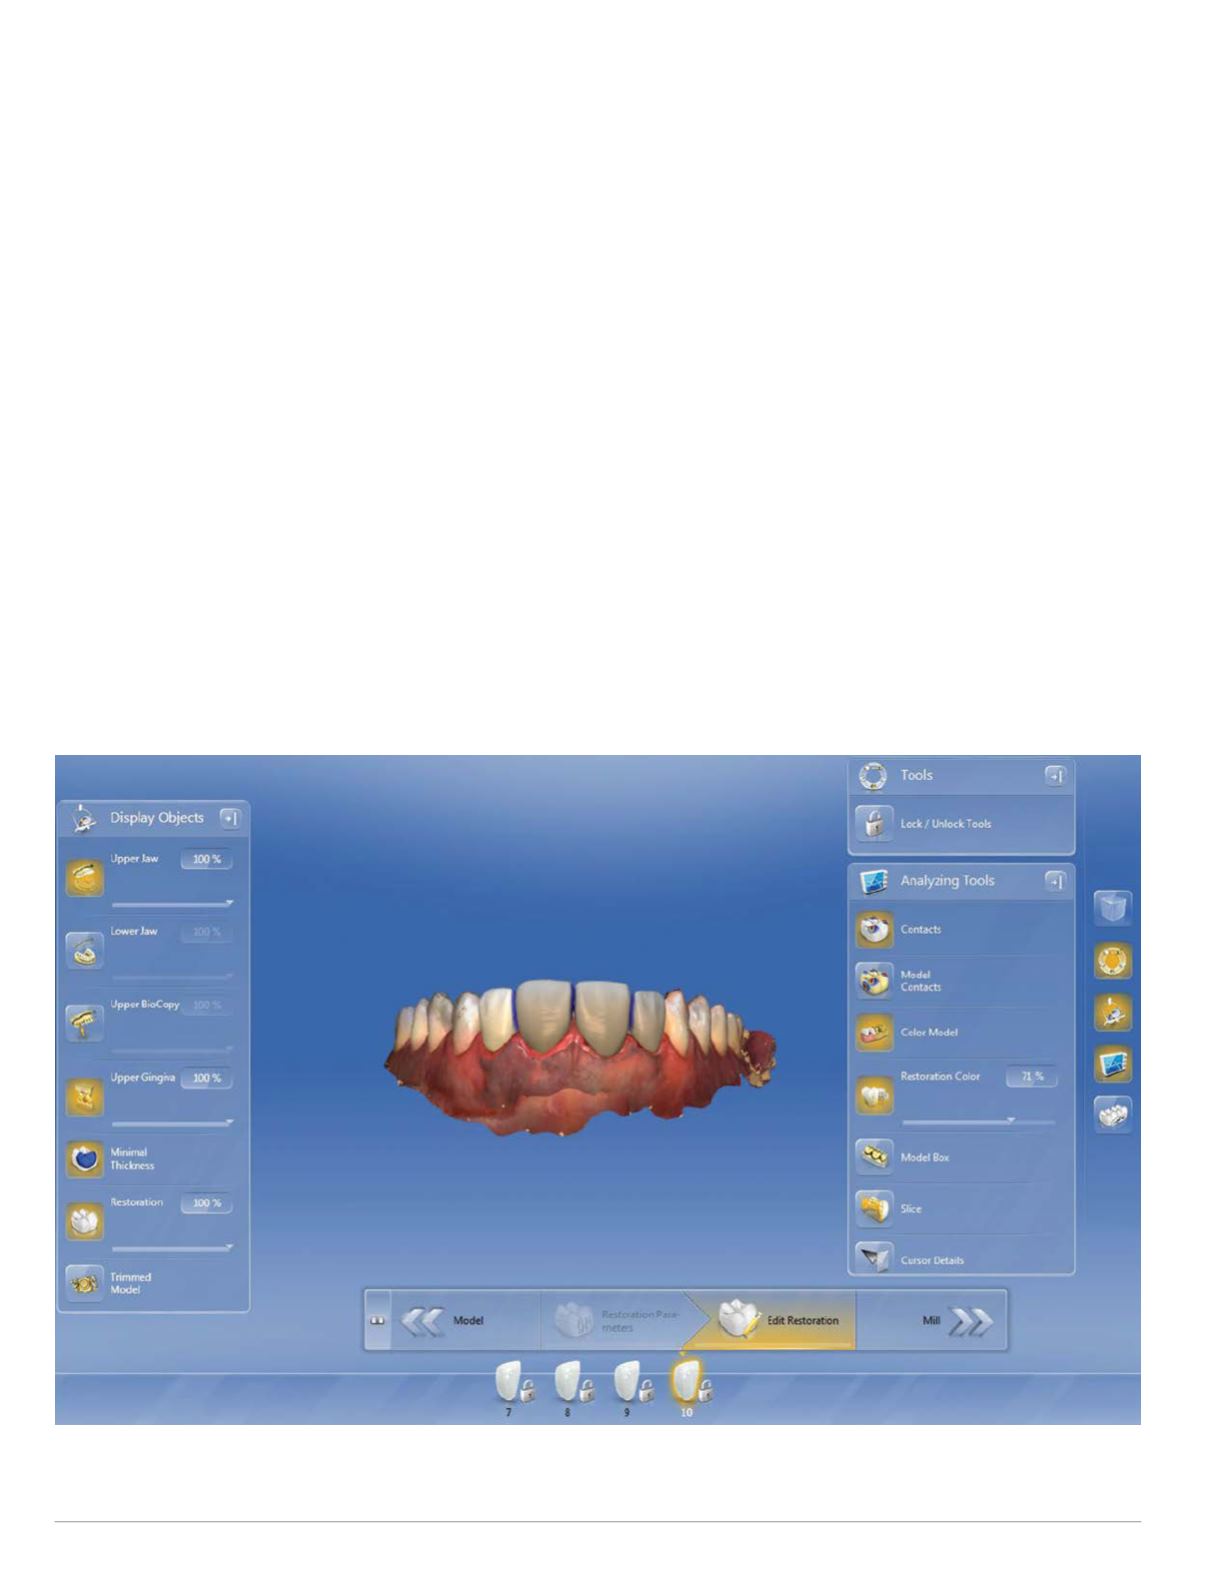
At this point in the design phase, the Gingiva Mask was retrieved
to verify the location of the un-displaced gingiva and evaluate how
Fig. 11: The GingivaMask image was used to verify the esthetics of the completed restorative design, as well as margin placement compared
to the un-displaced gingiva


